
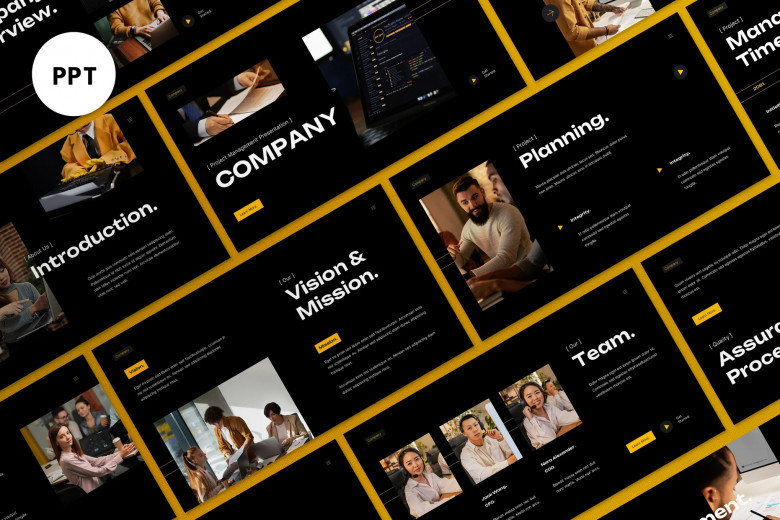
While readily available PowerPoint templates offer convenience, crafting your own from scratch provides unparalleled control, brand consistency, and a unique aesthetic that truly reflects your vision. This article will guide you through the process of creating your own custom PowerPoint template, empowering you to design presentations that stand out and leave a lasting impression.
The Foundation: Understanding Your Needs and Brand Identity
Before you even open PowerPoint, the most critical step is to define the purpose of your template and understand your brand identity. Ask yourself:
- Who is your audience? Is it internal colleagues, external clients, investors, or the general public? Your audience will influence the tone, color palette, and overall formality of your design.
- What is the primary message or goal of your presentations? Are you presenting data, pitching a product, delivering a lecture, or reporting on progress? The nature of your content will dictate the layout and emphasis.
- What are your brand guidelines? If you're creating a template for a company or organization, adhere strictly to existing brand guidelines, including logos, colors, fonts, and imagery. If it's for personal use, define your own consistent visual identity.
- What kind of content will you typically include? Will you be using a lot of images, charts, bullet points, or long blocks of text? Knowing this will help you design layouts that accommodate your content effectively.
By thoroughly addressing these questions, you'll lay a solid foundation for a template that is not only visually appealing but also highly functional and relevant to your needs.
Setting Up Your Canvas: Slide Size and Master Views
With a clear understanding of your requirements, it's time to dive into PowerPoint.
1. Choosing the Right Slide Size:
The standard slide size in modern PowerPoint is 16:9 (widescreen), which is ideal for most projectors and monitors. However, if you anticipate presenting on older equipment or need to print handouts in a specific format, you might consider 4:3 (standard). To adjust the slide size:
- Go to the Design tab.
- In the Customize group, click Slide Size.
- Choose Widescreen (16:9) or Standard (4:3), or select Custom Slide Size to define your own dimensions.
2. Mastering the Slide Master View:
This is where the real magic happens. The Slide Master allows you to define the common elements and formatting for all slides in your presentation, ensuring consistency and saving you countless hours. To access the Slide Master:
- Go to the View tab.
- In the Master Views group, click Slide Master.
You'll see a hierarchy of slides on the left pane. The very top slide is the Slide Master itself, which controls global settings for all layouts. Below it are various Layout Masters (e.g., Title Slide, Title and Content, Two Content, etc.). Each layout master dictates the design of a specific type of slide.
Any changes you make to the Slide Master will propagate to all layout masters and subsequently to all slides in your presentation. Changes made to a specific layout master will only affect slides using that layout.
Designing the Visual Elements: Colors, Fonts, and Backgrounds
Now for the creative fun! This is where you bring your brand identity to life within your template.
1. Defining Your Color Palette:
Colors evoke emotions and convey meaning. Choose a palette that aligns with your brand and the message you want to convey.
- Primary Colors: These are your dominant brand colors.
- Secondary Colors: These complement your primary colors and can be used for accents, charts, or specific elements.
- Accent Colors: Use these sparingly for highlighting key information or calls to action.
Within the Slide Master view:
- Go to the Slide Master tab.
- In the Background group, click Colors.
- Select an existing theme color set or, even better, click Customize Colors... to create your own. This allows you to define colors for text, backgrounds, accents, and hyperlinks, ensuring they are automatically applied throughout your template.
2. Selecting Your Fonts:
Fonts play a crucial role in readability and establishing tone. Choose fonts that are legible, professional, and consistent with your brand. Aim for a maximum of two to three fonts for an uncluttered look:
- Heading Font: For titles and main headings.
- Body Font: For the main content.
- Accent Font (Optional): For subtle emphasis or specific design elements.
Within the Slide Master view:
- Go to the Slide Master tab.
- In the Background group, click Fonts.
- Select an existing theme font set or click Customize Fonts... to define your own heading and body fonts.
3. Crafting Engaging Backgrounds:
Your background sets the overall mood. Keep it clean and uncluttered to avoid distracting from your content.
- Solid Colors: Simple, elegant, and versatile. Use colors from your defined palette.
- Gradients: Add subtle depth and visual interest.
- Images: Use high-quality, relevant images that enhance your message without overwhelming it. Ensure proper licensing. You can set an image as a background for the entire template or for specific layouts.
- Patterns/Textures: Use sparingly and ensure they don't hinder readability.
Within the Slide Master view:
- Select the desired master slide or layout.
- Go to the Slide Master tab.
- In the Background group, click Background Styles and choose a pre-defined style, or click Format Background... for more detailed options. Here you can fill with solid colors, gradients, pictures, or patterns.
Structuring Your Layouts: Placeholders and Consistency
This is where you define the structure of your content for different slide types.
1. Designing Layout Masters:
For each type of slide you anticipate using (e.g., Title Slide, Title and Content, Section Header, Quote, Image with Caption), customize its corresponding layout master:
- Title Slide: Focus on strong branding with your logo, presentation title, and presenter information.
- Title and Content: The most common layout. Ensure ample space for a title and bullet points or short paragraphs.
- Two Content: Ideal for comparing information side-by-side.
- Image with Caption: Design a layout that elegantly integrates images with descriptive text.
- Section Header: Use this to divide your presentation into logical sections, often with a different background or larger font.
- Quote Slide: A dedicated layout for impactful quotes.
2. Utilizing Placeholders:
Placeholders are crucial for ensuring consistent content formatting. They are pre-defined boxes for text, images, charts, and media.
- Within each layout master, insert placeholders for where your content will go.
- Go to the Slide Master tab.
- In the Master Layout group, click Insert Placeholder and choose the appropriate type (Text, Picture, Chart, Table, SmartArt, Media, Content).
- Resize and position these placeholders on your layout.
- Format the default text within text placeholders (font, size, color, bullet styles, line spacing) to establish consistency.
3. Adding Common Elements:
Consider elements that will appear on multiple slides:
- Logo: Place your company or personal logo strategically, usually in a corner, ensuring it's not intrusive.
- Page Numbers: Essential for longer presentations. Insert them in the footer area.
- Footers: Include copyright information, presentation date, or a brief tagline.
- Headers: Less common, but can be used for recurring titles or chapter names.
To add these elements:
- Go to the Insert tab (while in Slide Master view).
- In the Text group, click Header & Footer.
- Select the elements you want to include (Date and time, Slide number, Footer text) and apply them to all or selected layouts.
Refining and Testing Your Template
Once you've designed the core elements, it's time to refine and test.
1. Consistency Check:
- Review each layout master to ensure consistency in spacing, alignment, font sizes, and color usage.
- Ensure that logos and other recurring elements are placed identically across all relevant layouts.
2. Readability Test:
- Add dummy content to various layouts and view them in Normal view.
- Check text legibility against your chosen backgrounds.
- Ensure sufficient contrast between text and background colors.
3. Placeholder Functionality:
- In Normal view, insert new slides based on your custom layouts.
- Verify that the placeholders behave as expected and allow for easy content insertion.
4. Performance Check:
- If you've used high-resolution images, ensure they don't significantly increase the file size, which could lead to slow loading times. Optimize images if necessary.
Saving and Sharing Your Template
Once you're satisfied with your masterpiece, save it as a PowerPoint Template (.potx) file.
1. Saving Your Template:
- Go to File > Save As.
- In the Save as type dropdown, select PowerPoint Template (*.potx).
- PowerPoint will automatically default to the custom templates folder. It's recommended to save it there for easy access within PowerPoint.
2. Accessing Your Custom Template:
- When you open PowerPoint, go to File > New.
- Click on Personal (or Custom depending on your PowerPoint version) to find your newly created template.
Advanced Tips for a Professional Template
- Custom Shapes and Icons: Design custom shapes or use consistent icon sets to add visual interest and clarity. Add them to the Slide Master or specific layout masters.
- Animation and Transition Defaults: While generally kept simple in templates, you can set default transition styles (e.g., Fade) and even basic animation effects on placeholders within the Slide Master if they are consistently applied. However, less is often more here.
- Hidden Slides: You can create "hidden" layout masters that aren't immediately visible in the New Slide menu but can be accessed if needed.
- Accessibility Considerations: Ensure your template uses high contrast colors, clear fonts, and provides alternative text options for images for accessibility.
- Version Control: If you're collaborating or making significant changes, consider versioning your templates (e.g., MyTemplate_v1.0.potx).
- Documentation: For complex templates, consider creating a small document outlining how to use different layouts and best practices.
Creating your own custom PowerPoint template from scratch is an investment of time that pays dividends in consistency, professionalism, and creative control. By meticulously defining your needs, leveraging the Slide Master view, and paying attention to detail in design and functionality, you can craft a template that elevates your presentations and helps you communicate your message effectively. Say goodbye to generic designs and hello to a truly unique and impactful visual identity.

Comments
0 comment