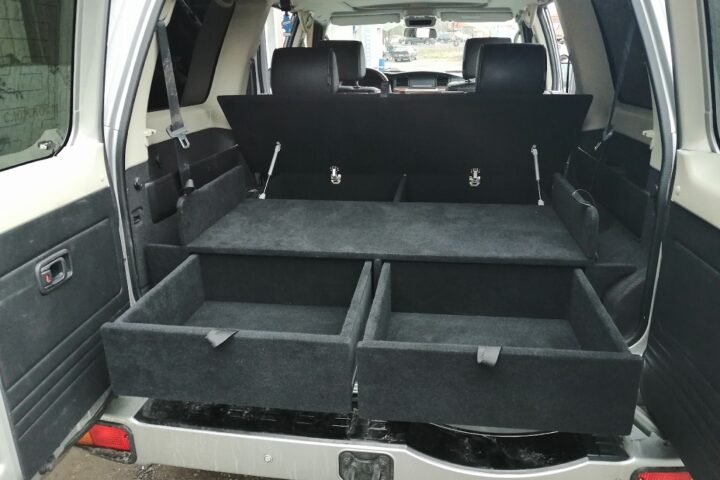
Are you an off-road enthusiast looking to optimise your vehicle’s storage space for your adventures? Building your own 4×4 drawer systems might just be the solution you’ve been searching for.
Not only does it allow you to customise your storage according to your needs, but it also adds a touch of personalisation to your rig.
In this comprehensive guide, we’ll take you through the step-by-step process of how to build your own 4×4 drawer systems easily.
Getting Started: Planning Your Design
Before you roll up your sleeves and dive into the project, it’s essential to have a clear plan in mind. Take some time to assess your storage requirements, considering the items you frequently carry during your off-road journeys.
Are you hauling camping gear, recovery equipment, or tools? Mapping out your storage needs will help you design a 4×4 drawer system that maximises space and efficiency.
Gathering Materials and Tools:
Once you’ve finalised your design, it’s time to gather the necessary materials and tools for the project. Here’s a basic list to get you started:
- Plywood or metal sheets for constructing the drawers
- Drawer slides for smooth operation
- Screws, nuts, and bolts for assembly
- Drill and driver set
- Measuring tape and pencil
- Saw for cutting materials to size
- Sandpaper for smoothing rough edges
- Optional: Drawer handles for added convenience and aesthetics

Step-by-Step Guide to Build Your Own 4×4 Drawer Systems
Measuring and Cutting
Accuracy is key. Measure your vehicle’s cargo space carefully to ensure your drawer system fits perfectly. Once you’ve got your dimensions, it’s time to cut your materials to size. Remember, measure twice and cut once!
Assembling the Frame
Start by assembling the outer frame of your drawer system. This will serve as the skeleton of your build, so ensure all corners are square and everything is secure.
Installing the Drawer Slides
This step is crucial for smooth operation. Attach your heavy-duty drawer slides to the frame, ensuring they are perfectly aligned and level. This will prevent any hiccups when sliding your drawers in and out.
Building and Fitting the Drawers
With the frame and slides in place, build your drawers to fit. This is where your earlier planning comes into play, as you customise the size and number of drawers to suit your needs. Once built, fit them into the frame and test for smooth operation.
Adding the Finishing Touches
Now for the fun part. Add any dividers, tie-down points, or special compartments within your drawers. Finishing the exterior with carpet or rubber not only looks great but also provides a non-slip surface for your gear.
Customisation Ideas
Now that you’ve mastered how to build your own 4×4 drawer systems, let’s talk customisation. Consider installing LED lighting inside your drawers for easy access at night, or add a built-in charging station for your gadgets. The sky’s the limit when it comes to making your drawer system uniquely yours.
Maintenance and Care
To keep your build your own 4×4 drawer systems in top shape, regular maintenance is key. This includes checking the drawer slides for debris, ensuring the locking mechanisms are secure, and keeping the interior clean from dust and dirt. A little care goes a long way in extending the life of your custom drawer system.
Wrapping Up
Congratulations! You’ve just taken a giant leap in elevating your 4×4’s organisation and functionality by learning how to build your own 4×4 drawer systems.
Not only have you created a custom solution that fits your adventure needs perfectly, but you’ve also added a personal touch to your rig that’ll make every journey more enjoyable and hassle-free.
Remember, the best adventures begin with great preparation. And now, with your new drawer system, you’re more prepared than ever to hit the road (or off-road) and make unforgettable memories. Happy travels!


